Step-by-Step Instructions to Crochet Daisy
  • Step 1 — Make a Slipknot

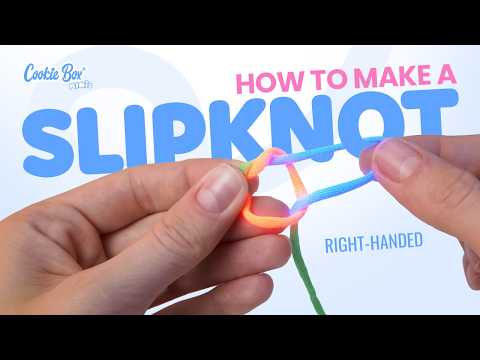
    A slipknot makes a loop you can pull bigger or smaller. It’s the first loop you’ll put on your hook. Let’s make one together!

    A slipknot makes a loop you can pull bigger or smaller. It’s the first loop you’ll put on your hook. Let’s make one together!

  • Step 2 — Hold Your Yarn

    Learn how to hold your yarn so it can slide through your fingers without getting too loose or too tight. Try a few simple tricks to keep your fingers relaxed.

    🪝 More help holding your yarn and hook

    Learn how to hold your yarn so it can slide through your fingers without getting too loose or too tight. Try a few simple tricks to keep your fingers relaxed.

    🪝 More help holding your yarn and hook

  • Step 3 — Know Your Hook

    Get to know the parts of your crochet hook, then try holding it like a knife or a pencil. Choose the hold that feels comfortable in your hand.

    🪝 More help holding your yarn and hook

    Get to know the parts of your crochet hook, then try holding it like a knife or a pencil. Choose the hold that feels comfortable in your hand.

    🪝 More help holding your yarn and hook

  • Step 4 — Make a Chain-2 Start

    Learn to make a chain stitch, then make two chains to create a chain-2 start for your plushie’s first round. Keep these two chains, or make extras for practice—the next lesson shows how to undo the extras.

    🧶 Written pattern:
    - Foundation: Chain-2 Start

    🪝 Alternative: a magic ring is an adjustable starting loop you can pull closed to avoid a hole in the center.

    Learn to make a chain stitch, then make two chains to create a chain-2 start for your plushie’s first round. Keep these two chains, or make extras for practice—the next lesson shows how to undo the extras.

    🧶 Written pattern:
    - Foundation: Chain-2 Start

    🪝 Alternative: a magic ring is an adjustable starting loop you can pull closed to avoid a hole in the center.

  • Step 5 — Undo Stitches

    Learn to undo stitches, called frogging, so you can fix mistakes. If you made extra practice chains, undo the extras and keep your first two for the first round.

    Learn to undo stitches, called frogging, so you can fix mistakes. If you made extra practice chains, undo the extras and keep your first two for the first round.

  • Step 6 — Single Crochet

    Learn to make a single crochet stitch and find the little V at its top to count your stitches. Use six single crochets to make your first round.

    🧶 Written pattern:
    Round 1: 6 sc (6)

    🧶 Found a knot or need to join a new yarn strand?

    Learn to make a single crochet stitch and find the little V at its top to count your stitches. Use six single crochets to make your first round.

    🧶 Written pattern:
    Round 1: 6 sc (6)

    🧶 Found a knot or need to join a new yarn strand?

  • Step 7.1 — Increase Demo

    Learn to make an increase (inc): two single crochet stitches in the same stitch. Each increase adds one stitch to your round, helping your plushie grow wider.

    Learn to make an increase (inc): two single crochet stitches in the same stitch. Each increase adds one stitch to your round, helping your plushie grow wider.

  • Step 7.2 — Widen Daisy’s Body

    Use increases and single crochet to widen Daisy’s body, following Rounds 2–12 below.

    🧶 Written pattern:
    Round 2: 6 inc (12)
    Round 3: [sc, inc] x 6 (18)
    Round 4: [2 sc, inc] x 6 (24)
    Round 5: [3 sc, inc] x 6 (30)
    Round 6: [4 sc, inc] x 6 (36)
    Round 7: 36 sc (36)
    Round 8: [5 sc, inc] x 6 (42)
    Round 9-12: 42 sc (42)

    Use increases and single crochet to widen Daisy’s body, following Rounds 2–12 below.

    🧶 Written pattern:
    Round 2: 6 inc (12)
    Round 3: [sc, inc] x 6 (18)
    Round 4: [2 sc, inc] x 6 (24)
    Round 5: [3 sc, inc] x 6 (30)
    Round 6: [4 sc, inc] x 6 (36)
    Round 7: 36 sc (36)
    Round 8: [5 sc, inc] x 6 (42)
    Round 9-12: 42 sc (42)

  • Step 8.1 — Decrease Demo

    Learn to make a decrease (dec), turning two stitches into one. Each decrease removes one stitch from your round, making your crochet narrower.

    Learn to make a decrease (dec), turning two stitches into one. Each decrease removes one stitch from your round, making your crochet narrower.

  • Step 8.2 — Narrow Daisy’s Body

    Use decreases to narrow Daisy’s body as you work Rounds 13–15.

    🧶 Written pattern:
    Round 13: [5 sc, dec] x 6 (36)
    Round 14: [4 sc, dec] x 6 (30)
    Round 15: [3 sc, dec] x 6 (24)

    Use decreases to narrow Daisy’s body as you work Rounds 13–15.

    🧶 Written pattern:
    Round 13: [5 sc, dec] x 6 (36)
    Round 14: [4 sc, dec] x 6 (30)
    Round 15: [3 sc, dec] x 6 (24)

  • Step 9.1 — Add Eyes & Stuff

    Place Daisy’s eyes and add stuffing before the opening gets too small. Then work the final body rounds.

    🧶 Written pattern:
    - Insert the eyes between rounds 8 and 9, 5 stitches apart.
    - Stuff the body.
    Round 16: [2 sc, dec] x 6 (18)
    Round 17: [sc, dec] x 6 (12)
    Round 18: 6 dec (6)
    - Cut the yarn, leaving a 4-inch tail for sewing.

    Place Daisy’s eyes and add stuffing before the opening gets too small. Then work the final body rounds.

    🧶 Written pattern:
    - Insert the eyes between rounds 8 and 9, 5 stitches apart.
    - Stuff the body.
    Round 16: [2 sc, dec] x 6 (18)
    Round 17: [sc, dec] x 6 (12)
    Round 18: 6 dec (6)
    - Cut the yarn, leaving a 4-inch tail for sewing.

  • Step 9.2 — Close the Body

    Thread the yarn tail through the front loop of each stitch around the opening and gently pull it closed. Hide the yarn tail inside your plushie.

    Thread the yarn tail through the front loop of each stitch around the opening and gently pull it closed. Hide the yarn tail inside your plushie.

  • Step 10.1 — Make Daisy’s Beak

    Crochet Daisy’s beak, then fold it and sew it onto the face.

    🧶 Written pattern:
    - Start with a Slipknot
    Round 1: 5 sc (5)
    Round 2: 5 inc (10)
    - Cut the yarn, leaving a 6-inch tail for sewing.

    - Fold the beak in half and sew through both sides to shape it. Ensure both yarn tails come out of the center at the back of the beak to prepare for sewing.
    - Attach the beak to the body, centered and a few rounds lower than the eyes.

    🪡 Invisible fasten-off demonstration

    Crochet Daisy’s beak, then fold it and sew it onto the face.

    🧶 Written pattern:
    - Start with a Slipknot
    Round 1: 5 sc (5)
    Round 2: 5 inc (10)
    - Cut the yarn, leaving a 6-inch tail for sewing.

    - Fold the beak in half and sew through both sides to shape it. Ensure both yarn tails come out of the center at the back of the beak to prepare for sewing.
    - Attach the beak to the body, centered and a few rounds lower than the eyes.

    🪡 Invisible fasten-off demonstration

  • Step 10.2 — Invisible Fasten Off

    Learn to finish with a sewn stitch that blends into the surrounding stitches. Gently adjust your new V until it matches the size of the others.

    Learn to finish with a sewn stitch that blends into the surrounding stitches. Gently adjust your new V until it matches the size of the others.

  • Step 11 — Make Daisy’s Wings

    Make two matching wings, then sew them onto the sides of Daisy’s body.

    🧶 Written pattern:
    Wings x 2
    - Chain-2 Start or Magic Ring
    Round 1: 9 sc (9)
    - Cut the working yarn, leaving a 6-inch yarn tail.

    - Attach the wings to the sides of the body between rounds 9 and 11.

    Daisy, made by you. A finished plushie, and new skills to take into your next project.

    Make two matching wings, then sew them onto the sides of Daisy’s body.

    🧶 Written pattern:
    Wings x 2
    - Chain-2 Start or Magic Ring
    Round 1: 9 sc (9)
    - Cut the working yarn, leaving a 6-inch yarn tail.

    - Attach the wings to the sides of the body between rounds 9 and 11.

    Daisy, made by you. A finished plushie, and new skills to take into your next project.